
Installing React JS in Visual Studio Code
React JS has become a cornerstone in modern web development, providing efficient and dynamic user interfaces. If you’re a developer looking to harness the power of React, this guide will walk you through the process of Install React JS in Visual Studio Code, a popular code editor. Whether you’re a beginner or an experienced developer, this step-by-step guide will help you get started with React development seamlessly.
Prerequisites:
Before starting, make sure you have the following installed on your system, begin your React JS journey, follow these simple Methods to install React JS in Visual Studio Code:
Method 1: Using Create React App (Recommended)
1. Install Visual Studio Code
Before you dive into React development, make sure you have Visual Studio Code installed on your machine. You can download it from the official website here.
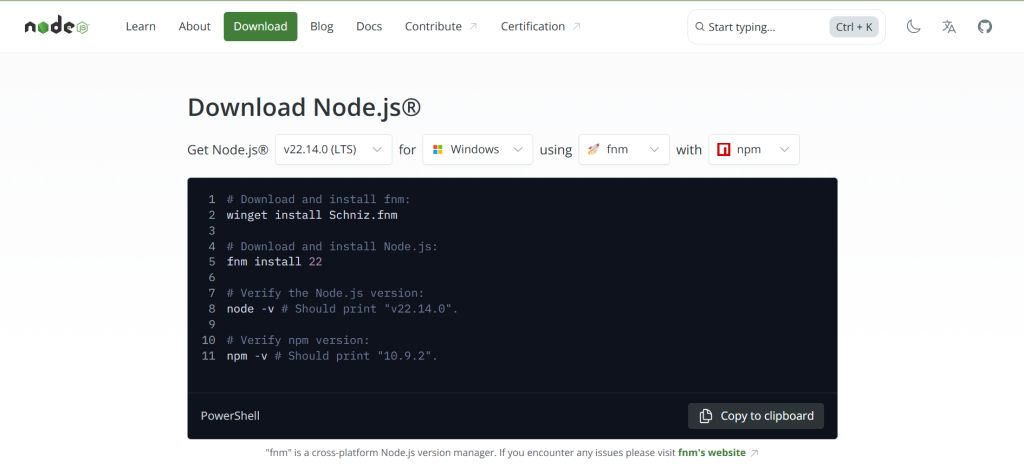
2. Set Up Node.js and npm
React JS relies on Node.js and npm (Node Package Manager) for managing dependencies and building applications. If you don’t have Node.js installed, download it from the official website here. Once installed, npm will be available in your command line.
3. Create a React App
Open your terminal and run the following command to create a new React app:
npx create-react-app my-react-app4. Navigate to the App Directory
Move to the app directory using the following command:
cd my-react-app5. Launch Visual Studio Code
Open the app in Visual Studio Code using the following command:
code .6. Start the Development Server
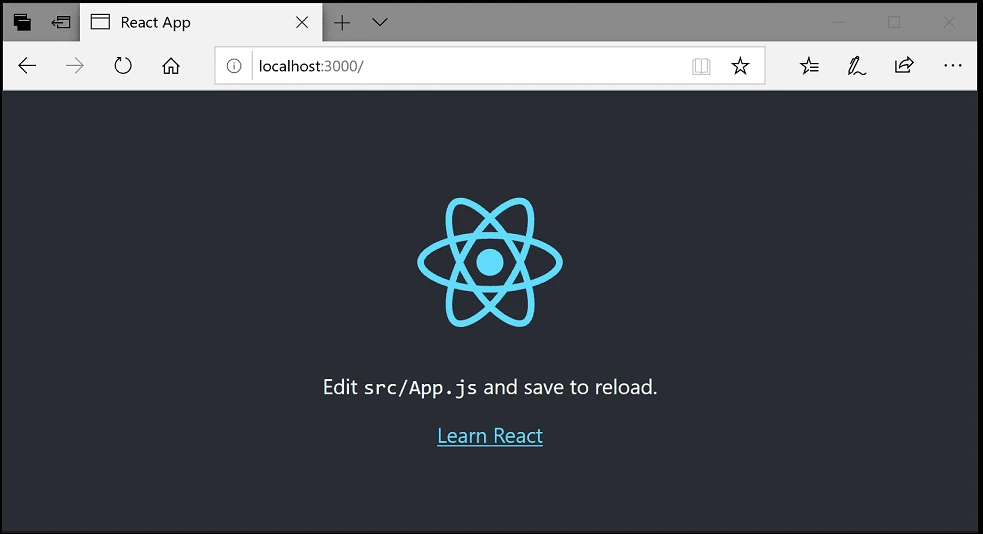
In the terminal within Visual Studio Code, start the development server:
npm startYour React app will now be running locally on a development server.
7. Begin Coding
You’re all set to start coding your React app! Open the src directory and begin exploring and modifying the code to create your desired application.
Check out: React JS in MVC
Method 2: Manually Configuring a React App (with Vite)
Vite is a fast build tool that significantly improves startup time compared to Create React App.
Step 1: Open Terminal
Again, inside VS Code press Ctrl + ** or **Cmd +
Step 2: Use Vite to Initialize React App
Execute this command in the terminal:
npm create vite@latest my-react-app -- --template react(Replace my-react-app with your project name.)
Step 3: Navigate into Project Folder & Install Dependencies
cd my-react-app
npm install
Step 4: Run the React App
npm run devYour React app should be accessible at:
http://localhost:3000Check out: Edit Js File in Chrome Developer Tools
Method 3: Manual React Setup (from scratch using Webpack & Babel)
This method offers a deeper understanding and customization capabilities.
Step 1: Create a Project Folder & Initialize npm
mkdir react-manual
cd react-manual
npm init -y
Step 2: Install Dependencies
Install React and ReactDOM:
npm install react react-domInstall Webpack, Babel, and loaders (development dependencies):
npm install --save-dev webpack webpack-cli webpack-dev-server babel-loader @babel/core @babel/preset-env @babel/preset-react html-webpack-pluginStep 3: Configure Babel & Webpack
Create .babelrc file at project root:
{
  "presets": ["@babel/preset-env", "@babel/preset-react"]
}
Create webpack.config.js at root directory:
const path = require('path');
const HtmlWebpackPlugin = require('html-webpack-plugin');

module.exports = {
  mode: 'development',
  entry: './src/index.js',
  output: {
    path: path.resolve(__dirname, 'dist'),
    filename: 'bundle.js',
  },
  devServer: {
    static: path.join(__dirname, 'dist'),
    port: 3000,
    open: true,
  },
  module: {
    rules: [
      {
        test: /\.jsx?$/,
        exclude: /node_modules/,
        use: 'babel-loader',
      },
    ],
  },
  plugins: [
    new HtmlWebpackPlugin({
      template: './public/index.html',
    }),
  ],
  resolve: {
    extensions: ['.js', '.jsx'],
  },
};
Step 4: Setup Project Structure
Create necessary folders/files in your project directory:
react-manual/
├── public/
│   └── index.html
├── src/
│   ├── App.jsx
│   └── index.js
├── .babelrc
├── webpack.config.js
└── package.jsonpublic/index.html:
<!DOCTYPE html>
<html lang="en">
<head>
  <meta charset="UTF-8" />
  <meta name="viewport" content="width=device-width, initial-scale=1.0" />
  <title>React Manual Setup</title>
</head>
<body>
  <div id="root"></div>
</body>
</html>
src/App.jsx
import React from 'react';

function App() {
  return <h1>Hello React (Manual Setup)</h1>;
}

export default App;
src/index.js
import React from 'react';
import ReactDOM from 'react-dom/client';
import App from './App';

const root = ReactDOM.createRoot(document.getElementById('root'));
root.render(<App />);
Step 5 – Run Your App
Modify your package.json scripts:
"scripts": {
  "start": "webpack serve --open",
  "build": "webpack"
}
Run development server:
npm startYour app runs at:
http://localhost:3000Additional Recommendations (Extensions & Tools):
Install these helpful VS Code extensions to improve productivity:
- ES7+ React/Redux/React-Native snippets
- Prettier
- ESLint
- Bracket Pair Colorizer
- Live Server
Common Issues & Troubleshooting:
- Port Already in Use:
npm start -- --port 3001- Node/npm Version Issues:
Always keep Node.js up-to-date. - Permission Issues:
Use administrator mode orsudo.
Check out: Handle Browser Back Button in React JS
FAQs (Frequently Asked Questions)
1. How do I check if Node.js is installed?
You can check if Node.js is installed by opening your terminal and typing node -v. If Node.js is installed, this command will display the version number.
2. What is npm?
npm stands for Node Package Manager. It is a tool that allows developers to manage and install packages (libraries, frameworks, and more) for their projects.
3. Can I use Visual Studio Code for other programming languages?
Absolutely! Visual Studio Code supports a wide range of programming languages and frameworks, making it a versatile choice for developers.
4. Do I need an internet connection to develop with React JS?
While an internet connection is not strictly required for React development, some features (such as installing new packages) may require it.
5. How do I deploy my React app to a live website?
To deploy your React app, you can use platforms like Netlify, Vercel, or GitHub Pages. These platforms provide easy ways to host and share your application online.
6. Is React JS difficult for beginners?
React JS can have a steep learning curve for complete beginners. However, with dedication and practice, even beginners can become proficient in React development.
Conclusion
Congratulations! You’ve successfully learned how to install React JS in Visual Studio Code. By following these steps, you’re now equipped to start your journey into React development. Remember that practice and experimentation are key to mastering React and building incredible user interfaces. Happy coding!
READ MORE | HIRE REACT DEVELOPER